giovedì 31 dicembre 2020

Collage Cards

Hi everyone it's Jenny here with a final post for 2020 here at MarteLAB. I'm sharing a tutorial for a set of collage cards created using a fabulous stencil design by Rebekah Meier that's available in the Marte store. Here are the first two cards in the set of six.


It feels like we all need as much love as we can get right now so these cards all feature the hearts that are a part of Rebekah's stencil design. Here's how they came together, starting with a 'masterboard' background on watercolour paper that includes some watercolour ink patches, white gesso, tea staining and texture paste through the 'lattice' part of Rebekah's stencil.


A mix of PaperArtsy 'Infusions' diluted with water was spread over teabag paper and dried with a heat tool before being torn into strips.


Below you can see where part of the 'masterboard' was cut into pieces large enough to cover white card blanks and the dyed teabag paper was torn into small strips.


To create the hearts I mixed some texture paste with a combination of PaperArtsy 'Infusions' storing the mix in  a small pot so it could be covered to prevent it from drying out too fast. You'll see where I checked how the colour would change as it dried.


The coloured paste was spread through the two heart shapes on the stencil onto kraft card. Once dry I cut around the paste shapes to remove the excess card. The paste can be heated with a heat tool to speed up the process.


To add more colour to each card I tore strips from tissue which had been painted with PaperArtsy chalk paint. The tissue was added to each background using a soft matte gel medium.


After adding some hand stitching I stamped the dot pattern from Seth Apter's PaperArtsy stamp set ESA02 onto the area where the hearts would go using black permanent ink. The hearts were then glued in place and each background added to a card blank.


Here are the final four cards in the set made in this way;


I hope you've enjoyed seeing today's cards and the tutorial has given you some ideas for creating your own projects. Thank you so much Marcella and Fabio for giving me the opportunity be a part of the Marte family this year. And to end I wish you all a peaceful, positive and safe 2021.

Jenny (Pushing The Right Buttons)

martedì 8 dicembre 2020

Don´t hide your magic - last page in the paper bag journal, with video tutorial

 Hello creative friends!

I hope you are all safe and healthy! 

It´s Melina here today sharing the last page in my 
recycled paper bag journal. Time flies, doesn´t it!? Feels like a month ago I shared the 
first page here in the blog, and now the year is almost over.

As always I recorded my process for you, and you´ll find the 
video tutorial further down.


So far I have dedicated this journal to flowers, but for this last page I just had to go with 
something more winter magical ;)


For this project I´ve been using stamps by That´s Crafty!
There are some of the That´s Crafty! stamps available in the Marte shop.

I´ve used DecoArt paints , and you´ll find a variety 
of DecoArt products in the shop too.

  You´ll find the video HERE , hope you´ll enjoy watching!


Thanks for stopping by today! 
I want to take the opportunity to thank you all for this year here on 
the MarteLab blog!

xx Melina


martedì 1 dicembre 2020

ICS#20.48 Christmas notebook by Marcella

 Hi everyone,

the Christmas atmosphere has entered my notebooks that can be travel diaries, bag notes, Christmas decorations ... and any excuse to write on them is fine.

Normally the basic notebook is an A5 format with decorated covers and interiors built with pages aged with coffee.

But Christmas has changed the format by transforming the classic notebook into a decoration and more....


The materials are always the same ... the preferred or personalized decorated papers, the aged papers in the coffee (the technique has already been illustrated in a previous post), the rounding machine ...

Bind it and the notebooks are done :-)


Marcella


giovedì 12 novembre 2020

 #20.45 Art Journaling by Nora

Hello creative souls!!! I hope you are all well!!!

This is my last creation as design team member for MarteLab, thank you Fabio and Marcella for everything!!!

I have created this double spread and I hope you like it.


Video tutorial:


Have a good time!!!

Happy Crafting!!!

Byeee

martedì 3 novembre 2020

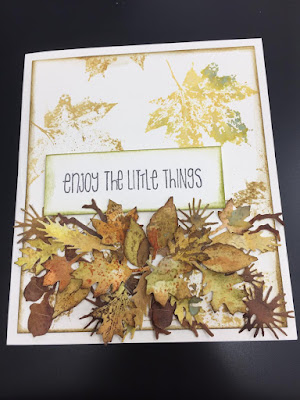
ICS#20.44 Autumn card by Marcella

Here I am with a new project.

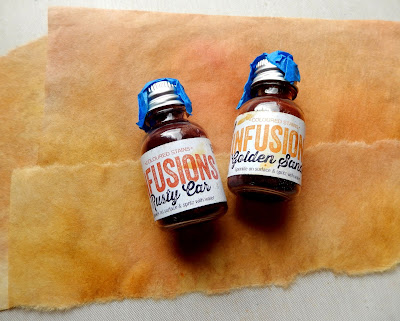
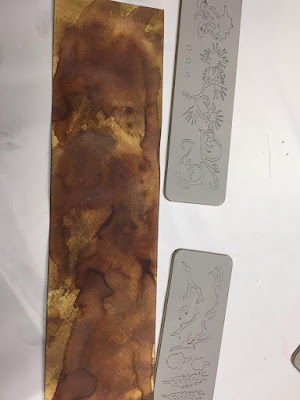
Autumn has arrived together with the spectacular colors that distinguish it. I started by coloring a background with Distress Ink and Oxide ...


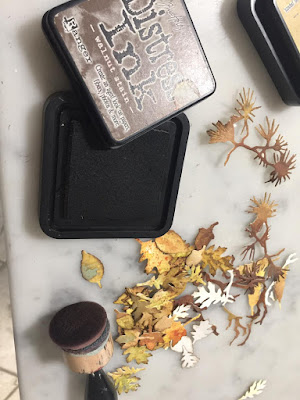
and then using it to create the elements for the autumn composition cutted with some Tim Holtz Decorative Strip Dies.


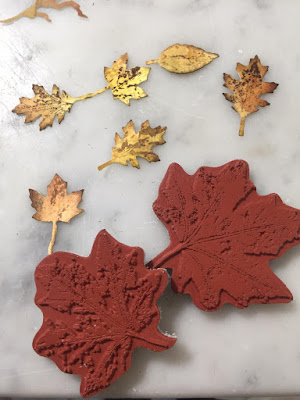
I continued creating the background with magnificent PapaerArtsy Leafs stamps with watercolor effects.


 Of course I distressed the edges ...


To make very real leaf, I stamped with Distress Ink the veins of the leaf.


The sentiment could not be missing ...

To mount the card I used the irreplaceable Beacon 3-in-1 Glue

and the card if finished!

Here some details ....


See you soon on MarteLAB blog!

   Marcella


martedì 27 ottobre 2020

Love - page 7 in my paper bag journal with video tutorial, by Melina

  Hello creative friends!


It´s Melina here today sharing the 7th page in my 
recycled paper bag journal. I recorded my process and you´ll find the 
video tutorial further down.


I hope you are all safe and healthy! 
Winter is coming here in Sweden and we just had our first snow a couple of days ago.
I have dedicated this journal to flowers, so I´ll keep the theme even though the season is
changing here :)


For this project I´ve been using stamps and stencils by That´s Crafty!,
some of them available in the Marte shop.

I´ve used DecoArt paints and mediums, 
and you´ll find a variety 
of DecoArt products in the shop too.

  You´ll find the video HERE , hope you´ll enjoy watching!


Thanks for stopping by today! 
See you again with a new journal page in a few weeks :) That will be my 
last page in the journal! Time really flies...
xx Melina


martedì 20 ottobre 2020

Take the Scenic Route Plaque - by Claudia

Hi, servus and thanks so much for stopping by!

Today I would like to share with you a plaque with the focal element being an Aall & Create stamp design.


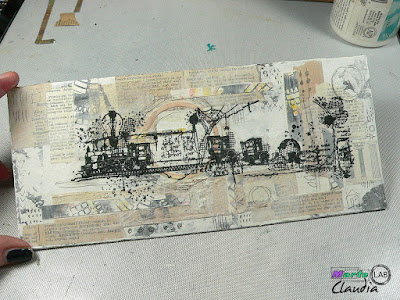
As a substrate I used a left over piece of heavy greyboard that I cut to size using a pair of heavy duty scissors. I measured the size for my plaque according to my focal element - the train scene from the Aall & Create border stamp #76.


I have used some more Aall & Create stamps and one stencil, but let's start with the first step of the tuto!

I primed my greyboard plaque with a thorough layer of black acrylic paint and after that had dried, I loosely scraped some white Gesso on top with a wide palette knife. I made sure some black spots still showed through. (for larger view simply click on the images)


The train scene had been stamped with black archival stamping ink onto some tissue and fussy cut. I used it to mark particular spots of the motive on my plaque, so I knew where to add additional designs without covering up the image.


Then I rummaged my paper bits box and fetched some old book pages, designer paper scraps, dried coffee pads and tea bags, a left over print done with the Aall & Create stencil #28 (at the very right) and some die cut left overs...


Time to collage away! The black and white Aall & Create "stencil print" got cut into strips that I used here and there for additional texture.


Then I toned down the whole background by adding a thin layer of diluted Titanium White DecoArt media fluid acrylic paint. Once that had dried, I did some scribbling with a pencil.


Finally it was time for the tissue stamped image to get glued in place! I used a very thin Decoupage glue so the tissue would not tear while being glued in place (using a very soft wide brush). You can of course also dilute the one you have to make it more liquid-y).


The Aall & Create stamp set #10 (one of my favourites) was perfect for adding more patterns and depth!


I let the black archival stamping ink dry before I went in with DecoArt media fluid acrylic paint "Transparent Yellow Iron Oxide" as a first.


That got followed by DecoArt media fluid acrylics Hansa Yellow Medium, Quinacridone Burnt Orange, Burnt Umber and more Titanium White.


I also added some doodling with a white acrylic paint pen here and there.
The "Take the Scenic Route" Quote Chip finished off the design.


Finally I blended the plaque's edges with black archival stamping ink using a piece of blending foam and I decided to add some hints of gold using gold wax (which I simply applied with my fingertip).


A thin gold and white outline around the plaque's edges helped fuse all the visual elements in the design.


Fatto! 


Some close ups:


...and once more the finished plaque. 


All you need to create a mixed media plaque like this can be found in the Marte online store of course (if not the exact brand then there is a product from a different manufacturer). 

Hugs and happy crafting!
Claudia
xxx